How to Build a Sustainable Rain Garden: A Step-by-Step Guide for Eco-Friendly Landscaping
Introduction: A rain garden is a sustainable landscaping solution designed to manage stormwater runoff, improve water quality, and create a habitat for local wildlife. By capturing and filtering rainwater, rain gardens help reduce pollution and erosion while adding beauty to your landscape. This guide will walk you through the process of building a rain garden, from planning and design to plant selection and maintenance.
1. Understanding Rain Gardens:
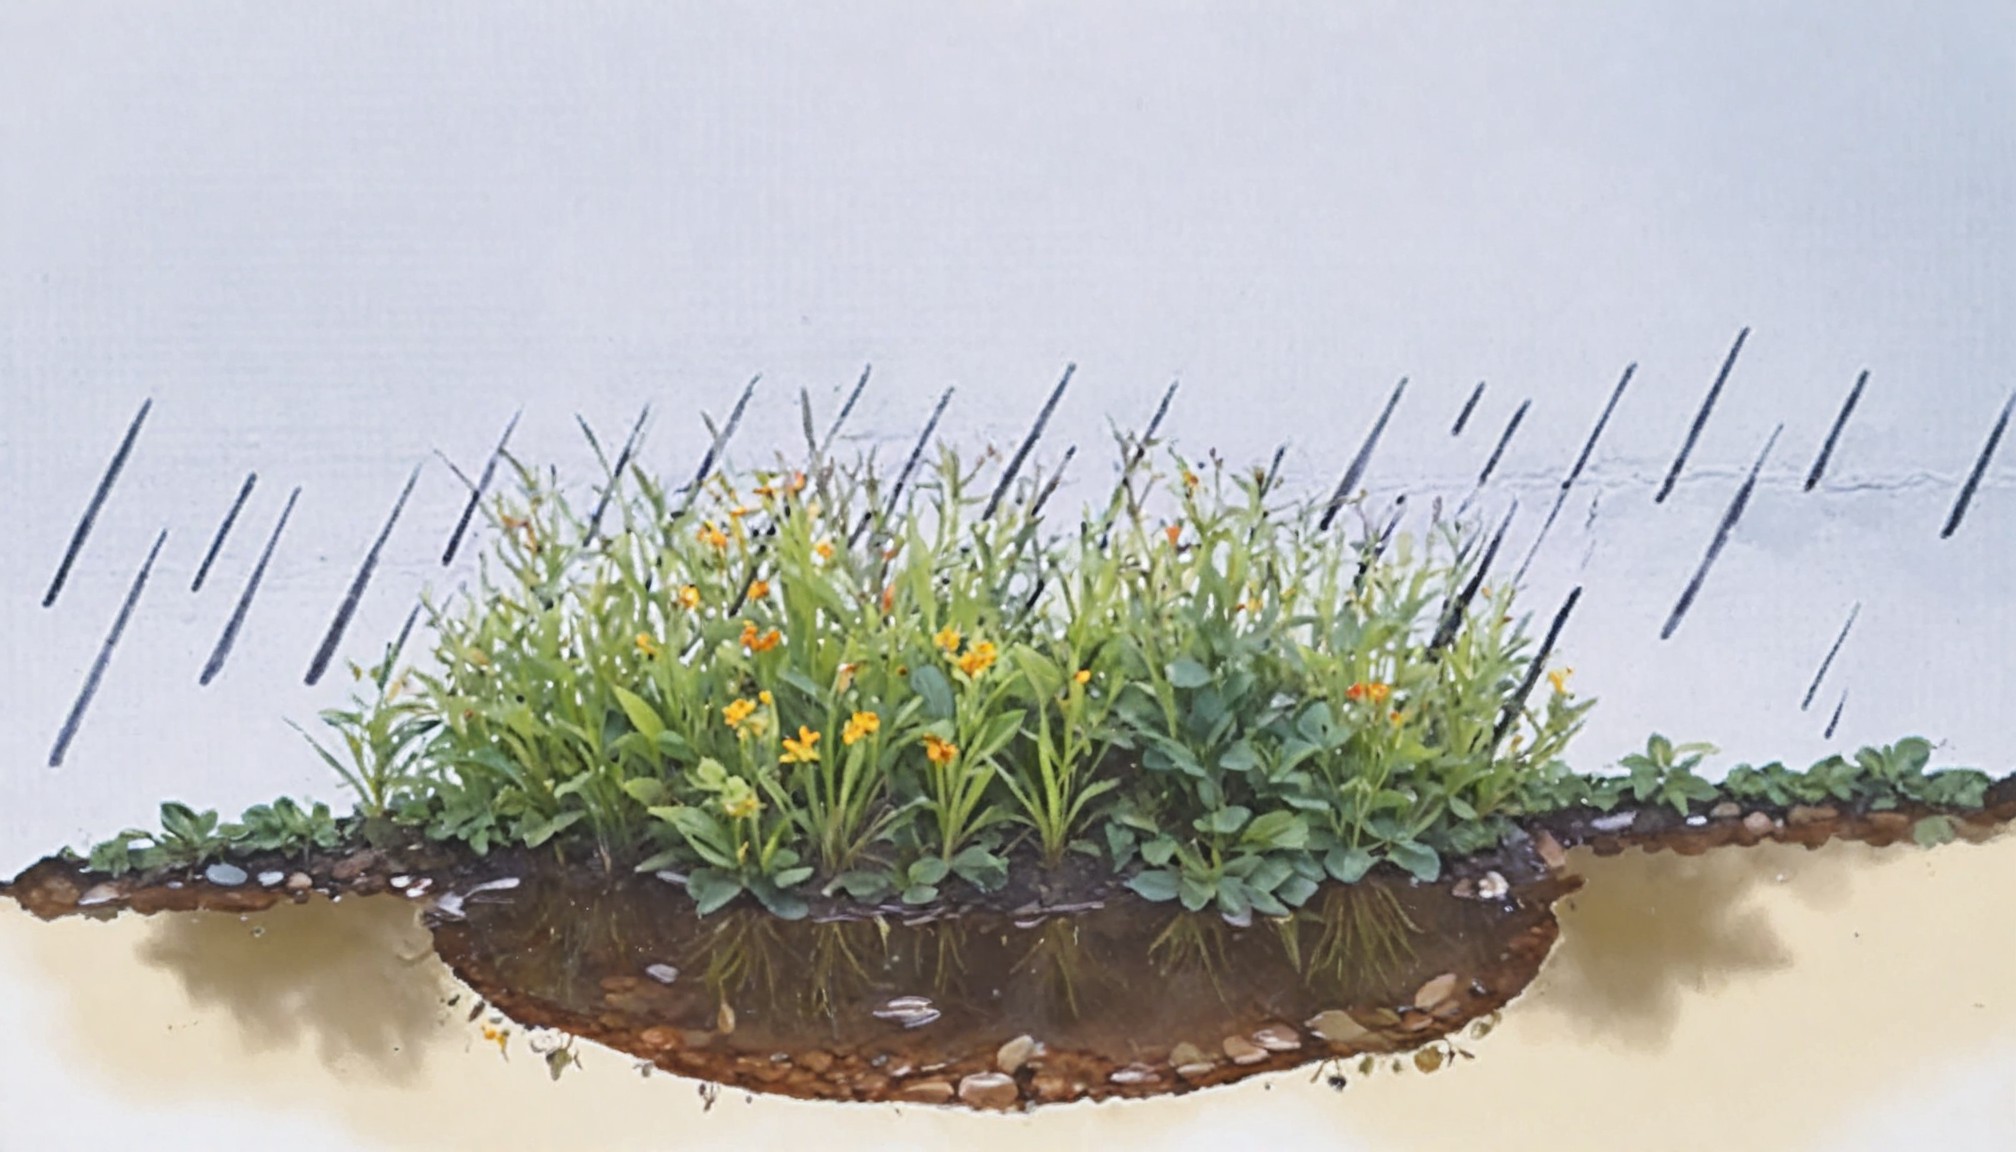
a. What is a Rain Garden? A rain garden is a shallow, landscaped depression designed to collect and absorb rainwater from impervious surfaces like driveways, roofs, and sidewalks. It typically includes a combination of native plants and soil amendments that help filter pollutants and promote water infiltration.
b. Benefits of a Rain Garden:
- Reduces Stormwater Runoff: Captures rainwater, reducing the volume of runoff that flows into storm drains and waterways.
- Improves Water Quality: Filters pollutants like sediment, oils, and nutrients before they enter local water bodies.
- Enhances Biodiversity: Provides habitat for birds, butterflies, and beneficial insects.
2. Planning and Design:
a. Choosing the Location: Select a location for your rain garden that is at least 10 feet away from buildings, foundations, and septic systems. Ideal locations include low-lying areas where water naturally collects, such as near downspouts or in lawn depressions. Ensure the site has good drainage and is not prone to standing water for extended periods.
b. Determining the Size: The size of your rain garden should be proportional to the area of impervious surfaces that will drain into it. A general guideline is to design the rain garden to be about 20-30% of the size of the contributing drainage area. For example, if you have a 1,000-square-foot roof area draining into the garden, the rain garden should be approximately 200-300 square feet.
3. Excavation and Soil Preparation:
a. Digging the Rain Garden: Excavate the area to create a shallow basin with a gentle slope. The depth should be around 6-12 inches in the center, with sloped sides to facilitate water flow and infiltration. Ensure the basin has a level bottom and proper grading to direct water toward the center.
b. Improving Soil Drainage: Amend the soil with a mix of sand, compost, and topsoil to improve drainage and water-holding capacity. A typical soil mixture consists of 60% sand, 20% compost, and 20% topsoil. The addition of compost provides nutrients for plant growth and helps retain moisture.
4. Selecting Plants:
a. Choosing Native Plants: Select a mix of native plants that are well-suited to the local climate and soil conditions. Native plants are more resilient and require less maintenance. Consider including:
- Grasses: Switchgrass, Little Bluestem
- Wildflowers: Black-eyed Susan, Butterfly Weed
- Shrubs: Virginia Sweetspire, Buttonbush
b. Planting Design: Arrange plants in layers, with taller plants in the center and shorter plants around the edges. This design creates a natural look and provides diverse habitat opportunities. Incorporate plants with varying bloom times to ensure year-round interest and support for pollinators.
5. Installing the Rain Garden:
a. Adding Mulch: Apply a layer of mulch over the soil to help retain moisture, suppress weeds, and prevent erosion. Use organic mulch such as wood chips or shredded bark. The mulch layer should be about 2-3 inches deep.
b. Planting: Plant your selected native species according to the design plan. Space plants according to their mature size to avoid overcrowding. Water the plants thoroughly after planting to help them establish.
6. Maintenance and Care:
a. Regular Inspections: Monitor the rain garden for signs of erosion, weed growth, or plant health issues. Remove any debris or accumulated sediment from the garden to ensure proper water flow and filtration.
b. Seasonal Maintenance:
- Spring: Remove winter debris, prune dead plant material, and check for any signs of erosion or sediment buildup.
- Summer: Water plants as needed, especially during dry periods, and mulch to maintain soil moisture.
- Fall: Clean up fallen leaves and prepare the garden for winter by adding additional mulch if necessary.
7. Troubleshooting Common Issues:
a. Poor Drainage: If water is not draining as expected, check for clogs or compacted soil. Improve drainage by adjusting the grading or adding additional soil amendments.
b. Plant Health Problems: Address any issues with plant health by ensuring proper watering and checking for pests or diseases. Replace any dead or struggling plants as needed.
Conclusion: Building a rain garden is a proactive way to manage stormwater runoff, enhance water quality, and support local wildlife. By following these steps, you can create a sustainable and beautiful addition to your landscape that benefits both the environment and your community. Embrace the opportunity to transform your garden into a functional and eco-friendly space that contributes to a healthier ecosystem.
Recent articles from Gardening

How to Choose a Bird Feeder / Where to Install It and What to Fill It With
To watch birds and help them survive the hungry times, you don't necessarily have to go outside: simply hang a bird feeder on your balcony or window. We explain the advantages and disadvantages ...

How to Create a Pollinator-Friendly Garden: Attracting Bees, Butterflies, and Birds
Introduction: A pollinator-friendly garden is essential for supporting the health and diversity of local ecosystems. Pollinators such as bees, butterflies, and birds play a cruc...

The Scent of Calm: 12 Plants That Help Relieve Stress
Gallup Global Emotions Report 2023 found that 44% of people worldwide experienced "a lot of stress" the day before the survey—matching or exceeding previous highs. Stress levels...