How to Build a DIY Floating Shelf in 5 Simple Steps
Introduction: Looking to add a modern, minimalist touch to your living space? A floating shelf is a perfect DIY project to elevate your home decor while adding practical storage. With just a few materials and some basic tools, you can create a sleek, custom shelf that appears to "float" on your wall. In this guide, we’ll walk you through building a DIY floating shelf in just five easy steps.
Materials Needed:
- Wooden board (your choice of size)
- Wall anchors and screws
- Metal brackets or floating shelf brackets
- Drill
- Level
- Stud finder
- Sandpaper
- Paint or wood stain (optional)
Step 1: Choose Your Shelf Material Start by selecting the wooden board for your shelf. Choose a sturdy wood, such as pine, oak, or cedar, depending on the look you want and how much weight the shelf will need to support. Sand the edges and surface to smooth out any rough spots. If you want a custom color, now is the time to stain or paint the wood and let it dry completely.
Step 2: Find the Perfect Spot Decide where you want to install the floating shelf. Use a stud finder to locate studs in the wall for extra support, especially if you plan to store heavy items on the shelf. Mark the spots where you want to install the brackets or anchors. Use a level to ensure the marks are even.
Step 3: Install the Brackets Drill holes where you’ve marked the spots for the brackets. If you hit a stud, you can install the screws directly. If not, insert wall anchors for added strength. Attach the brackets or floating shelf supports securely to the wall.
Step 4: Attach the Shelf Once the brackets are in place, carefully place the wooden shelf on top of them. Depending on the type of brackets you’re using, you may need to secure the shelf to the brackets with screws. Ensure everything is level before fully tightening the screws.
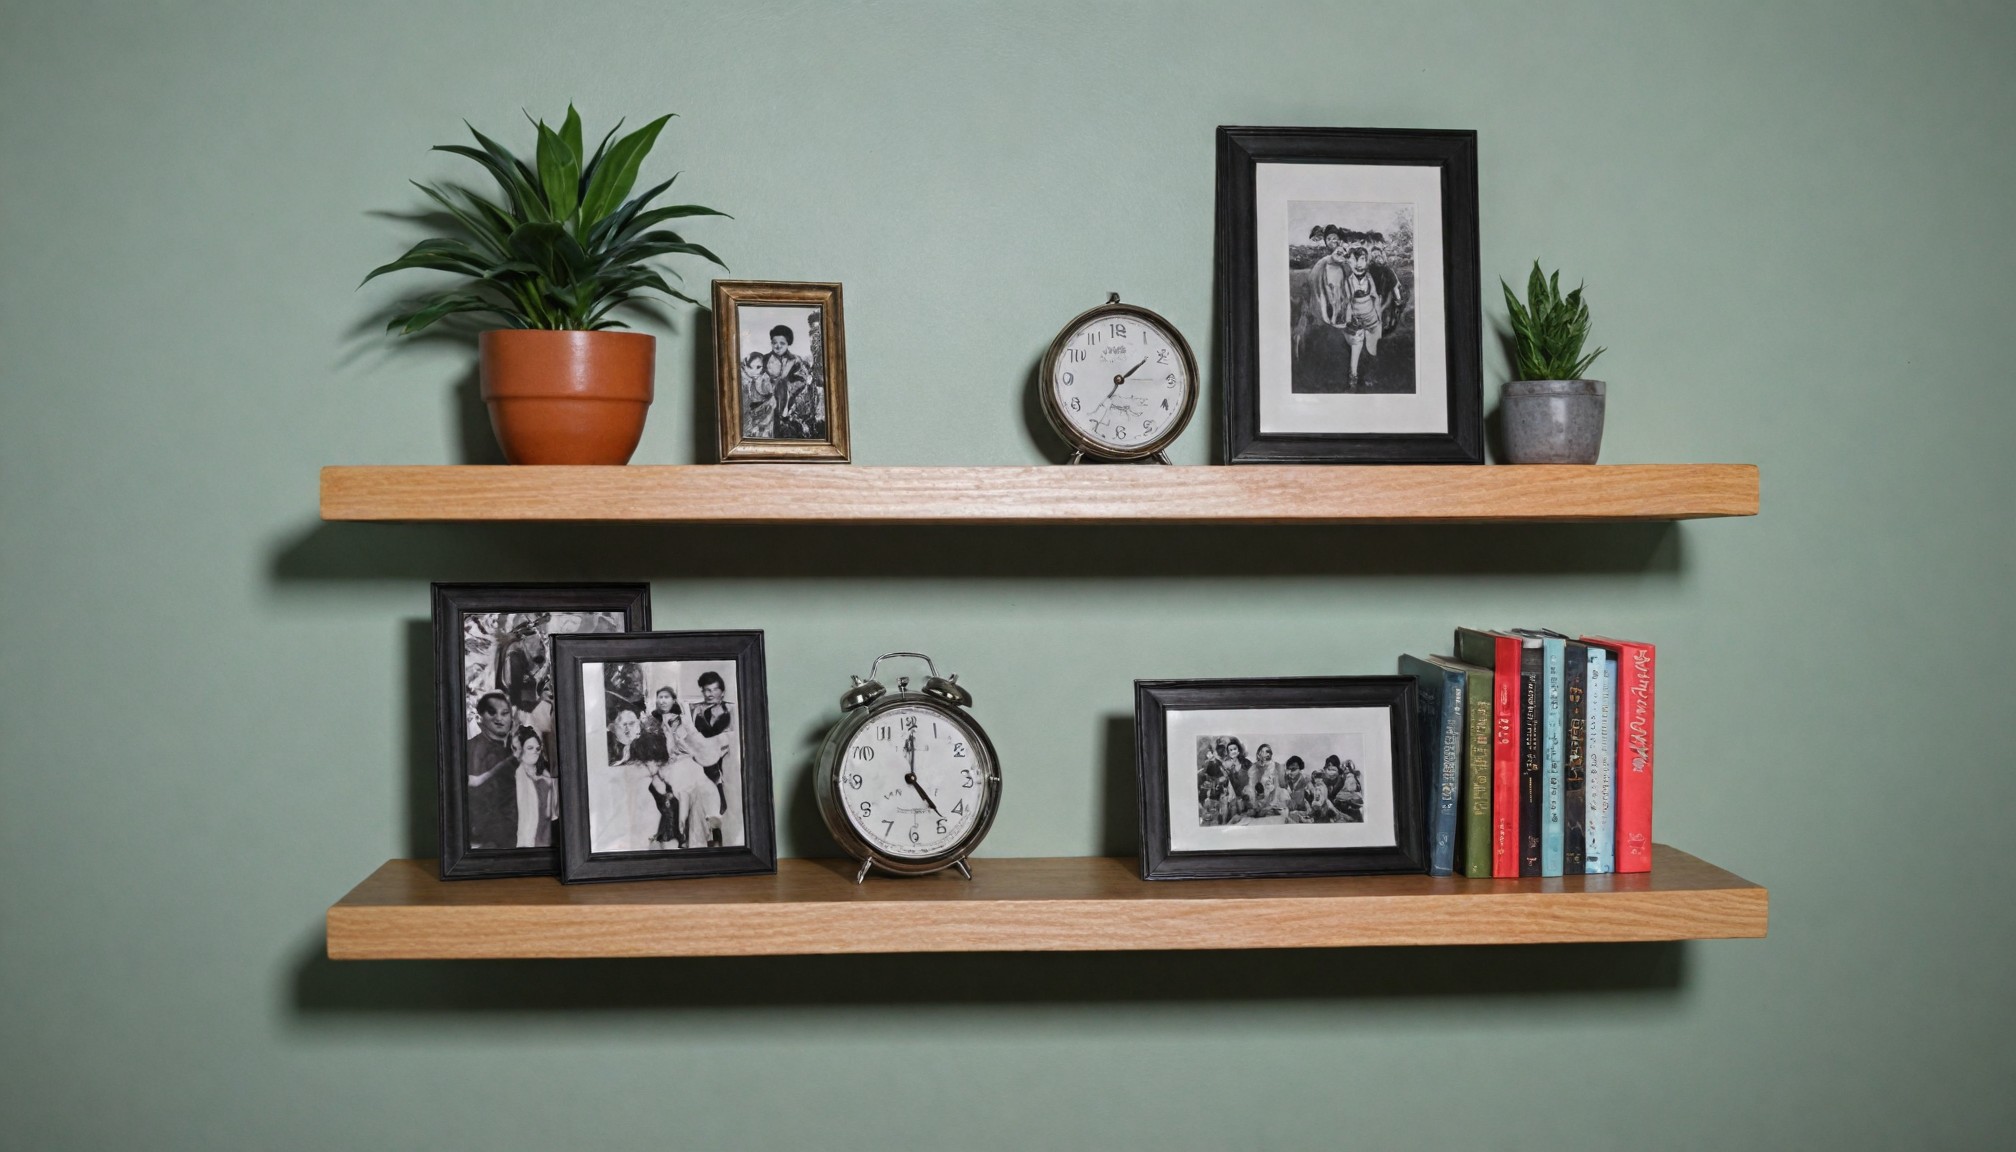
Step 5: Style and Enjoy Your floating shelf is ready! Now it’s time to style it with your favorite decor. Display framed photos, small plants, or books to make your space look organized and chic.
Conclusion: Building a DIY floating shelf is a simple yet impactful way to upgrade any room. Whether you need extra storage or just want to enhance your wall space, this project is versatile, budget-friendly, and achievable in just a few steps. Give your home a fresh look today with this easy DIY project!
Recent articles from Diy

10 Creative Ways to Repurpose Old CDs
If you’ve stumbled upon a stack of old CDs or DVDs tucked away in a cupboard, don’t toss them just yet! While these discs are rarely used for their original purpose anymore, they can be transfor...
DIY: Repurposed Book Page Bookmarks
A creative way to save your place and reduce waste
Love reading but tired of using traditional bookmarks? Why not create your own unique bookmarks using old book pages? It...

Sweet DIY New Year Gifts / 7 Festive Ideas
In December, many of us are busy searching for holiday gifts for friends and family. We spend hours wandering through stores, unsure of what to choose. Often, the most memorable gifts are the on...